How to Add a Custom Email Template to ChimpBridge Pro
ChimpBridge Pro supports selecting a specific email template for your Mailchimp campaign. The Template tab will now offer you a choice of one of our built-in email templates for your Mailchimp campaign, a custom email template of your own design, or the option to not use a template at all.
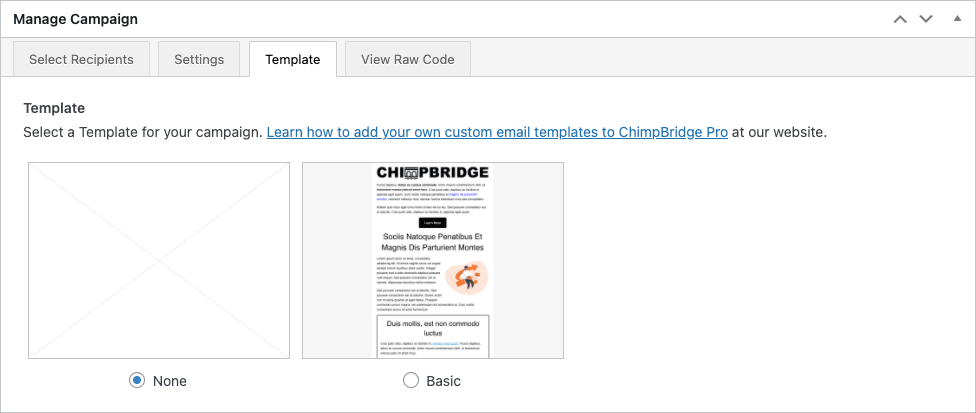
When you install ChimpBridge Pro for the first time you will only see two choices: None and Basic. The Basic email template is included with ChimpBridge Pro to give users a beginning option to choose from. The files that comprise the Basic template are also a good starting point for making your own email template.
We’ll walk you through the requirements to add your own custom email template to ChimpBridge Pro next. If you are familiar with HTML, CSS, and the basic requirements for an HTML email you should be ready to go.
ChimpBrige Pro Email Template Files
A ChimpBridge Pro email template consists of four files:
- layout.html
- editor-style.css
- editor-formats.json
- screenshot.png
Technically, the editor-formats.json file is optional but the other three are required. Let’s go through each one in detail so you know exactly what you need for your custom email template to work in ChimpBridge Pro.
For full examples, please look at the Basic email template included in ChimpBridge Pro. You can find it in the plugin files. it is located in email-templates/basic in the ChimpBridge Pro plugin folder.
layout.html
This file is the heart of your email template. It is the combination of HTML and CSS that makes up the structure and design of your template. We recommend following the same structure as the Basic email template with your CSS located in the file, at the top, and some basic structuring in HTML.
The key to making this layout.html work is by telling the file where you want the content of your Mailchimp campaign to go. You handle this by adding the following tag to your layout.html where your content should be inserted:
{{CONTENT}}
This is a very important step. Without this tag, your email template will not work. ChimpBridge Pro will be loading up your layout.html file and inserting your campaign content before sending any information to Mailchimp. Failure to tell ChimpBridge Pro where the content goes in your template will result in Mailchimp receiving an empty newsletter.
editor-style.css
One of the neat parts about ChimpBridge Pro’s templating system is that you can match how the WordPress Visual Editor looks to your email template. You accomplish this by adding CSS to the editor-style.css file in your email templates theme.
In this file, only put the CSS that applies to the actual content area of your template. That CSS should match with the CSS you have included in your layout.html so what users see in the Visual Editor is consistent with what Mailchimp sends to your audience.
editor-formats.json
The WordPress Visual Editor is powered by a popular WYSIWYG text editor called TinyMCE. You can add custom formatting options to TinyMCE through a simple JSON-powered system. ChimpBridge Pro supports this system and will look for formatting rules in your custom email template folder by searching for an editor-formats.json file.
You can learn more about how TinyMCE content formats work at the official site. There is also a great tutorial at WPBeginner about adding custom formats to the WordPress Visual Editor. Finally, if you just want a place to start, check out the editor-formats.json file in the Basic email template included in ChimpBridge Pro.
screenshot.png
The last file you’ll need for your custom email template is a screenshot. ChimpBridge Pro will load the screenshot.png file in your email template’s folder and display it in the plugin’s interface. This way your users can get a quick visual peek of what the template will look like before choosing it.
Installing Your ChimpBridge Pro Custom Email Template
It is time to get your email template live now that you have followed the process above. Put all of your files into a folder, give that folder a descriptive name, and then upload it to your website’s server. You will need to put your email template folder inside of wp-content/chimpbridge-templates. If this is your first ChimpBridge Pro email template, you will need to create the chimpbridg-templates folder beforehand.
So, for example, let’s say your custom email template folder is called one-column-newsletter. You would need to upload that folder to wp-content/chimpbridge-templates/one-column-newsletter in order for it to appear inside of ChimpBridge Pro.
Important Issues to Consider
While you can create any kind of a template you want, please understand there are limitations because of ChimpBridge Pro’s use of the WordPress Visual Editor. We recommend avoiding multi-column layouts or anything that has complicated layouts. Simple, one-column layouts, with unique typography and color elements, are the best things to worry about in your custom email template.
Also, because of the complexity of HTML email support in today’s modern browsers and email applications, there’s a very good chance your templates will not work 100% correctly in Microsoft Outlook products. Again, this is a limitation of the WordPress Visual Editor and, to be honest, a limitation of the Outlook environment’s rendering.
Finally, ChimpBridge Pro’s support team does not offer assistance for custom email templates in terms of their HTML or CSS. We can not help you with layout or design issues. Of course, if your theme isn’t loading or the plugin is malfunctioning in some way please contact us for support in those scenarios.
Start Designing Custom Email Templates for Mailchimp!
With ChimpBridge Pro, you now have the ability to control your Mailchimp campaign’s look without ever using the template or design editor on Mailchimp.com. You can make templates for special campaigns, create a template for a client to use each week, or for any other scenario that fits your needs.